Tile cutters are essential for anyone looking to complete a tile project efficiently and professionally. Whether you’re working on a kitchen backsplash, bathroom floor, or outdoor patio, knowing how to use a tile cutter properly can make a huge difference in the outcome of your project. In this guide, we’ll walk you through the process of using a tile cutter, covering various types of tile cutters, techniques for different cuts, and tips to ensure clean, precise results every time.
Why a Tile Cutter Is Essential for Any Tiling Project
Installing tiles can transform any space, but achieving a professional look requires precise cutting. Using a tile cutter is an efficient way to make clean cuts in ceramic, porcelain, and sometimes even natural stone tiles. Unlike manual tile cutting tools that can be challenging to handle, a tile cutter simplifies the task, allowing for straighter cuts and reduced wastage. If you’re ready to tackle your next tile project with confidence, follow along to learn how to use a tile cutter effectively.

1. Understanding Different Types of Tile Cutters
Manual Tile Cutters
Manual tile cutters are the most common type and are perfect for DIY enthusiasts working on smaller projects. These cutters are lightweight, easy to use, and typically involve a scoring wheel to create a line on the tile surface. You then apply pressure to snap the tile along the score line.
- Pros: Easy to use, portable, and affordable.
- Cons: Limited to straight cuts and may struggle with harder tiles.
Electric Tile Cutters
Electric tile cutters, often called wet saws, are ideal for larger projects or cutting harder materials like stone. These machines use a diamond blade and water to cool the tile during cutting, which prevents chipping and cracking.
- Pros: Can handle various cuts, including intricate shapes; great for hard materials.
- Cons: Higher cost, requires electricity, and may need extra setup and maintenance.
Tile Nippers
Tile nippers are useful for creating rounded or irregular cuts that a tile cutter cannot make. Though they require more effort, they are handy for finishing edges or making small adjustments on intricate tile patterns.

2. Preparing Your Workspace and Gathering Materials
Before you start cutting tiles, preparation is key. Set up a clean, flat workspace where you can easily access all your tools. Make sure you have adequate lighting, especially if you’re working with dark tiles that can be challenging to see. Gather the following materials:
- Tile cutter (manual or electric)
- Safety gear (goggles, gloves, mask)
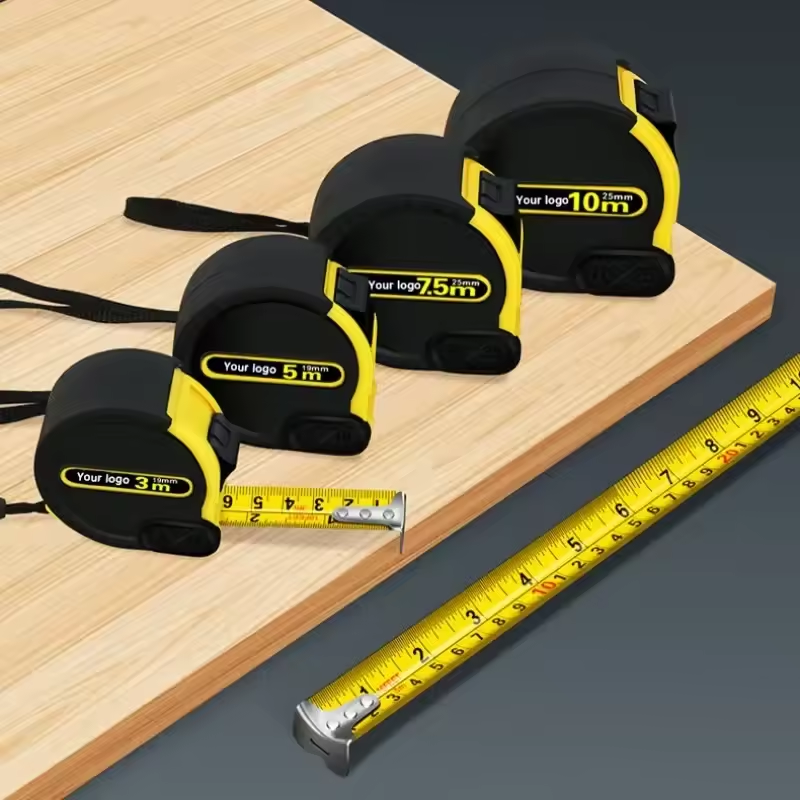
- Measuring tape or ruler
- Pencil or washable marker
- Tiles
- Water source (if using an electric tile cutter)
Ensuring that your workspace is organized and your tools are within reach will make the entire process smoother and help you achieve accurate cuts.
3. How to Use a Manual Tile Cutter for Straight Cuts
Step 1: Measure and Mark the Tile
Measure the area where the tile will be placed and transfer these measurements onto the tile. Use a pencil or washable marker to mark the cutting line clearly on the surface.
Step 2: Position the Tile in the Cutter
Place the tile on the tile cutter with the marked line directly beneath the scoring wheel. Ensure the tile is straight and held firmly in place to avoid uneven cuts.
Step 3: Score the Tile
Apply even pressure as you slide the scoring wheel along the marked line. Scoring should only require a single pass. Avoid scoring the tile multiple times, as this can weaken the tile and lead to an uneven break.
Step 4: Snap the Tile Along the Scored Line
Once scored, apply pressure on the tile to snap it along the scored line. Many manual cutters have a breaking bar specifically designed for this purpose. Apply firm, even pressure to create a clean break.
Step 5: Smooth the Edges (If Needed)
After cutting, use a sanding stone or tile file to smooth out any rough edges, ensuring a polished finish that will align well with other tiles.

4. Using an Electric Tile Cutter for Precision Cuts
Step 1: Set Up the Wet Saw
Place the wet saw on a stable, flat surface and fill the water reservoir as specified by the manufacturer. The water will keep the blade cool and reduce dust while cutting, which is essential for preventing chips.
Step 2: Measure and Mark the Tile
Just like with the manual cutter, measure and mark the tile where you want to cut. Be sure the mark is visible so you can align it with the saw blade accurately.
Step 3: Position the Tile on the Saw Table
Align the tile on the wet saw table, positioning it so the mark lines up with the blade. Hold the tile firmly with both hands and ensure you have a steady grip before beginning the cut.
Step 4: Start the Saw and Make the Cut
Turn on the saw and gently push the tile toward the blade, keeping your hands clear of the cutting path. Allow the blade to do the work, and avoid forcing the tile through, as this could cause it to crack. For complex cuts, go slowly to maintain control.
Step 5: Smooth the Edges (If Needed)
After cutting, check the edges. If there are any rough spots, use a sanding stone or tile file to create a clean, finished look.
5. Tips for Making Angled and Diagonal Cuts
Using a Manual Cutter for Angled Cuts
While manual tile cutters are limited in flexibility, angled cuts are possible with some adjustments:
- Measure and mark the tile along the desired angle.
- Position the tile so the marked angle is in line with the scoring wheel.
- Score and snap the tile as usual, applying pressure carefully to avoid chipping.
Making Diagonal Cuts with a Wet Saw
- Mark the tile at a 45-degree angle for diagonal cuts.
- Position the tile on the saw’s table and line it up with the blade.
- Slowly guide the tile through the blade along the marked line, ensuring precision for an even cut.
Diagonal cuts are often required for complex tile designs and can add a unique touch to your project. Electric cutters with guides make these cuts easier, ensuring clean, consistent angles.

6. Mastering Curved Cuts with Tile Nippers
Curved cuts are challenging but achievable with tile nippers:
- Mark the desired curve on the tile surface.
- Use the tile nippers to carefully chip away small sections along the curve.
- Take your time to ensure the curve remains smooth and follow the line closely to prevent over-cutting.
Curved cuts are useful when tiling around obstacles like pipes or rounded fixtures. With practice, tile nippers allow for precise shaping without damaging the tile.
7. Common Mistakes to Avoid When Using a Tile Cutter
Even with careful planning, mistakes can happen. Here’s how to avoid common errors:
- Forcing the Cut: Whether using a manual or electric cutter, forcing the tile through the blade or scoring wheel can cause cracks. Let the tool do the work.
- Improper Scoring: Only score once. Re-scoring weakens the tile and can result in uneven breaks.
- Not Using Water with Electric Cutters: Running a wet saw without water can cause overheating, which leads to chipping. Always ensure the water reservoir is filled.
- Skipping Safety Gear: Always wear goggles and gloves. Tile cutting produces dust and sharp fragments that can be hazardous.
Learning from these common errors can save time and prevent material wastage, ultimately giving your project a more professional finish.
8. Maintaining Your Tile Cutter for Long-Term Use
Tile cutters are an investment, and proper maintenance is key to ensuring they last. Here are some maintenance tips:

- Clean After Each Use: Remove any debris from the cutter after every session, especially from the blade or scoring wheel.
- Inspect and Replace Blades Regularly: For electric cutters, ensure the blade is sharp. Dull blades increase the risk of chipping.
- Lubricate Moving Parts: Manual cutters have moving parts that benefit from occasional lubrication for smooth operation.
Taking care of your tile cutter not only extends its lifespan but also improves the quality of cuts over time.
Conclusion: Achieving Professional Results with a Tile Cutter
Using a tile cutter may seem intimidating at first, but with a bit of practice and careful preparation, it becomes an indispensable tool for any tiling project. From simple straight cuts to intricate shapes, a tile cutter allows you to bring your design ideas to life with precision and efficiency. Follow this guide, avoid common mistakes, and master the techniques outlined above to achieve stunning results that enhance the look of any room.


